Set Up CertiScan
STEP 1: Register Yourself
You will receive an email from the CertiScan support team with Subject Line: “CertiScan Invite”.
Click the “Accept Invite” link, and follow the instructions to create your account.
Ensure the email address that you use to create your account matches the email address of your invite.
Next, you will receive a SECOND email to “Activate your CertiScan Account”.
Click the “Activate Your Account” link, then continue through the login screen. When presented with a choice, click the PROVIDER (not patient) “Go to portal” link.
Continue and click through the 2 onboarding screens.
At this point, consider bookmarking the web portal main page: https://app.certiscan.cloud.
STEP 2: Set Up The Reader
First Install CertiScan Connect
CertiScan Connect is a program that runs in the background on your computer and allows the web portal and reader to connect with each other.
First, download the installer:
Double click the installation file and go through the wizard, accepting all conditions and clicking “Next" or "Accept” until finished.
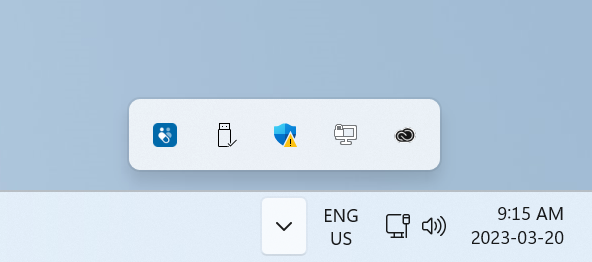
To verify installation, click the system tray arrow in the lower right corner of your Taskbar. Among the other system icons, you should also see a blue square with the CertiScan logo.

Then Plug in the Reader
Connect to your PC using the included USB cable.
Verify that the reader icon in the top right corner of the web portal is green (this means CertiScan Connect is running and the reader is successfully plugged in).
The reader icon will be red if CertiScan Connect is not running, and it will be orange if CertiScan Connect is running but the reader cable is not plugged in.
The reader does not work on metal surfaces (tables, etc.). If the reader status is green but your packages do not scan, this may be the culprit. Consider putting a book or stack of papers below your reader to elevate it away from the metal.