Set Up a Patient
You must set up each patient in order for them to use their smart packages successfully.
Initiate Patient Set Up
Go to the “Patients” page.
The next few steps depend on how your project has been set up. Please choose the correct option below:
- Patients Have Been Prepopulated
- Patients Have NOT Been Prepopulated
Search for the patient you need to set up.
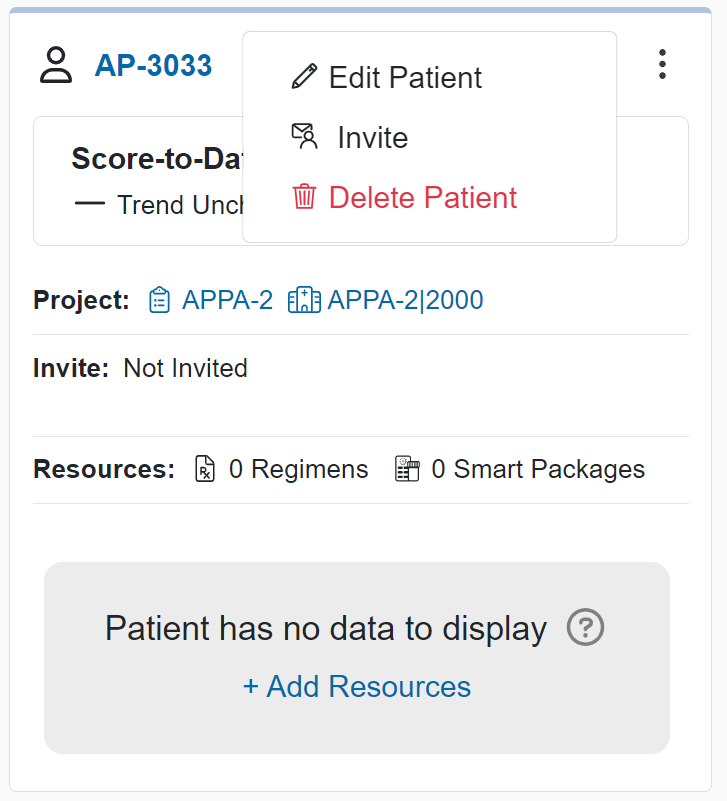
If the patient needs access to the mobile app for remote monitoring, click the ellipsis (...) in the top right of the patient card and then "Invite" the patient.
Then, click the “+Add Resources” button in the bottom of the patient card.

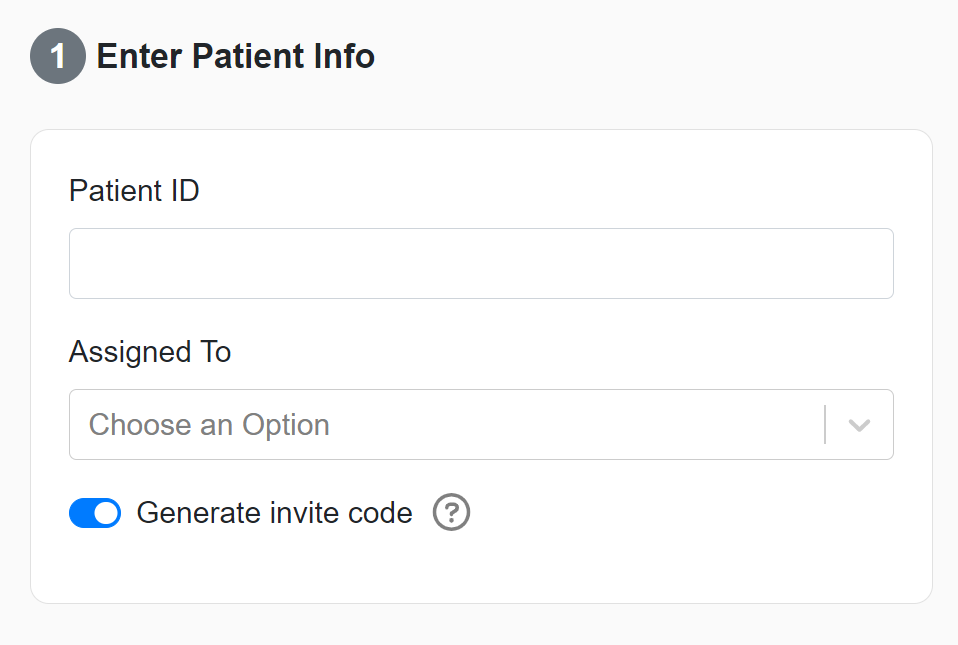
Click the “Add Patient” button.
Enter the “Patient Info”: Patient ID, "Assigned To" site, and if the patient needs access to the mobile app, leave the invite code setting “On”, otherwise toggle it “Off”.

Finish Patient Set Up
From this point onwards the steps are the same (regardless of whether or not the patient list was prepopulated).
Set up the patient regimen (a regimen describes the medications to be taken):
- Select a template.
- Rename the regimen if needed (generally not needed nor recommended).
- Set regimen dates to match the duration of treatment.
- Start date should be when the patient must take their first dose. By default the start date will auto-fill to the current date.
- Stop date should be the final day of the patient’s treatment. Depending on your project configuration, the stop date may auto-fill to a certain date based on a default regimen duration - otherwise you should set the stop date manually.
- The “Advanced” toggle lets you finely configure the schedule, but we generally recommend leaving the templated schedule as-is.
Finally, assign a NEW smart package:
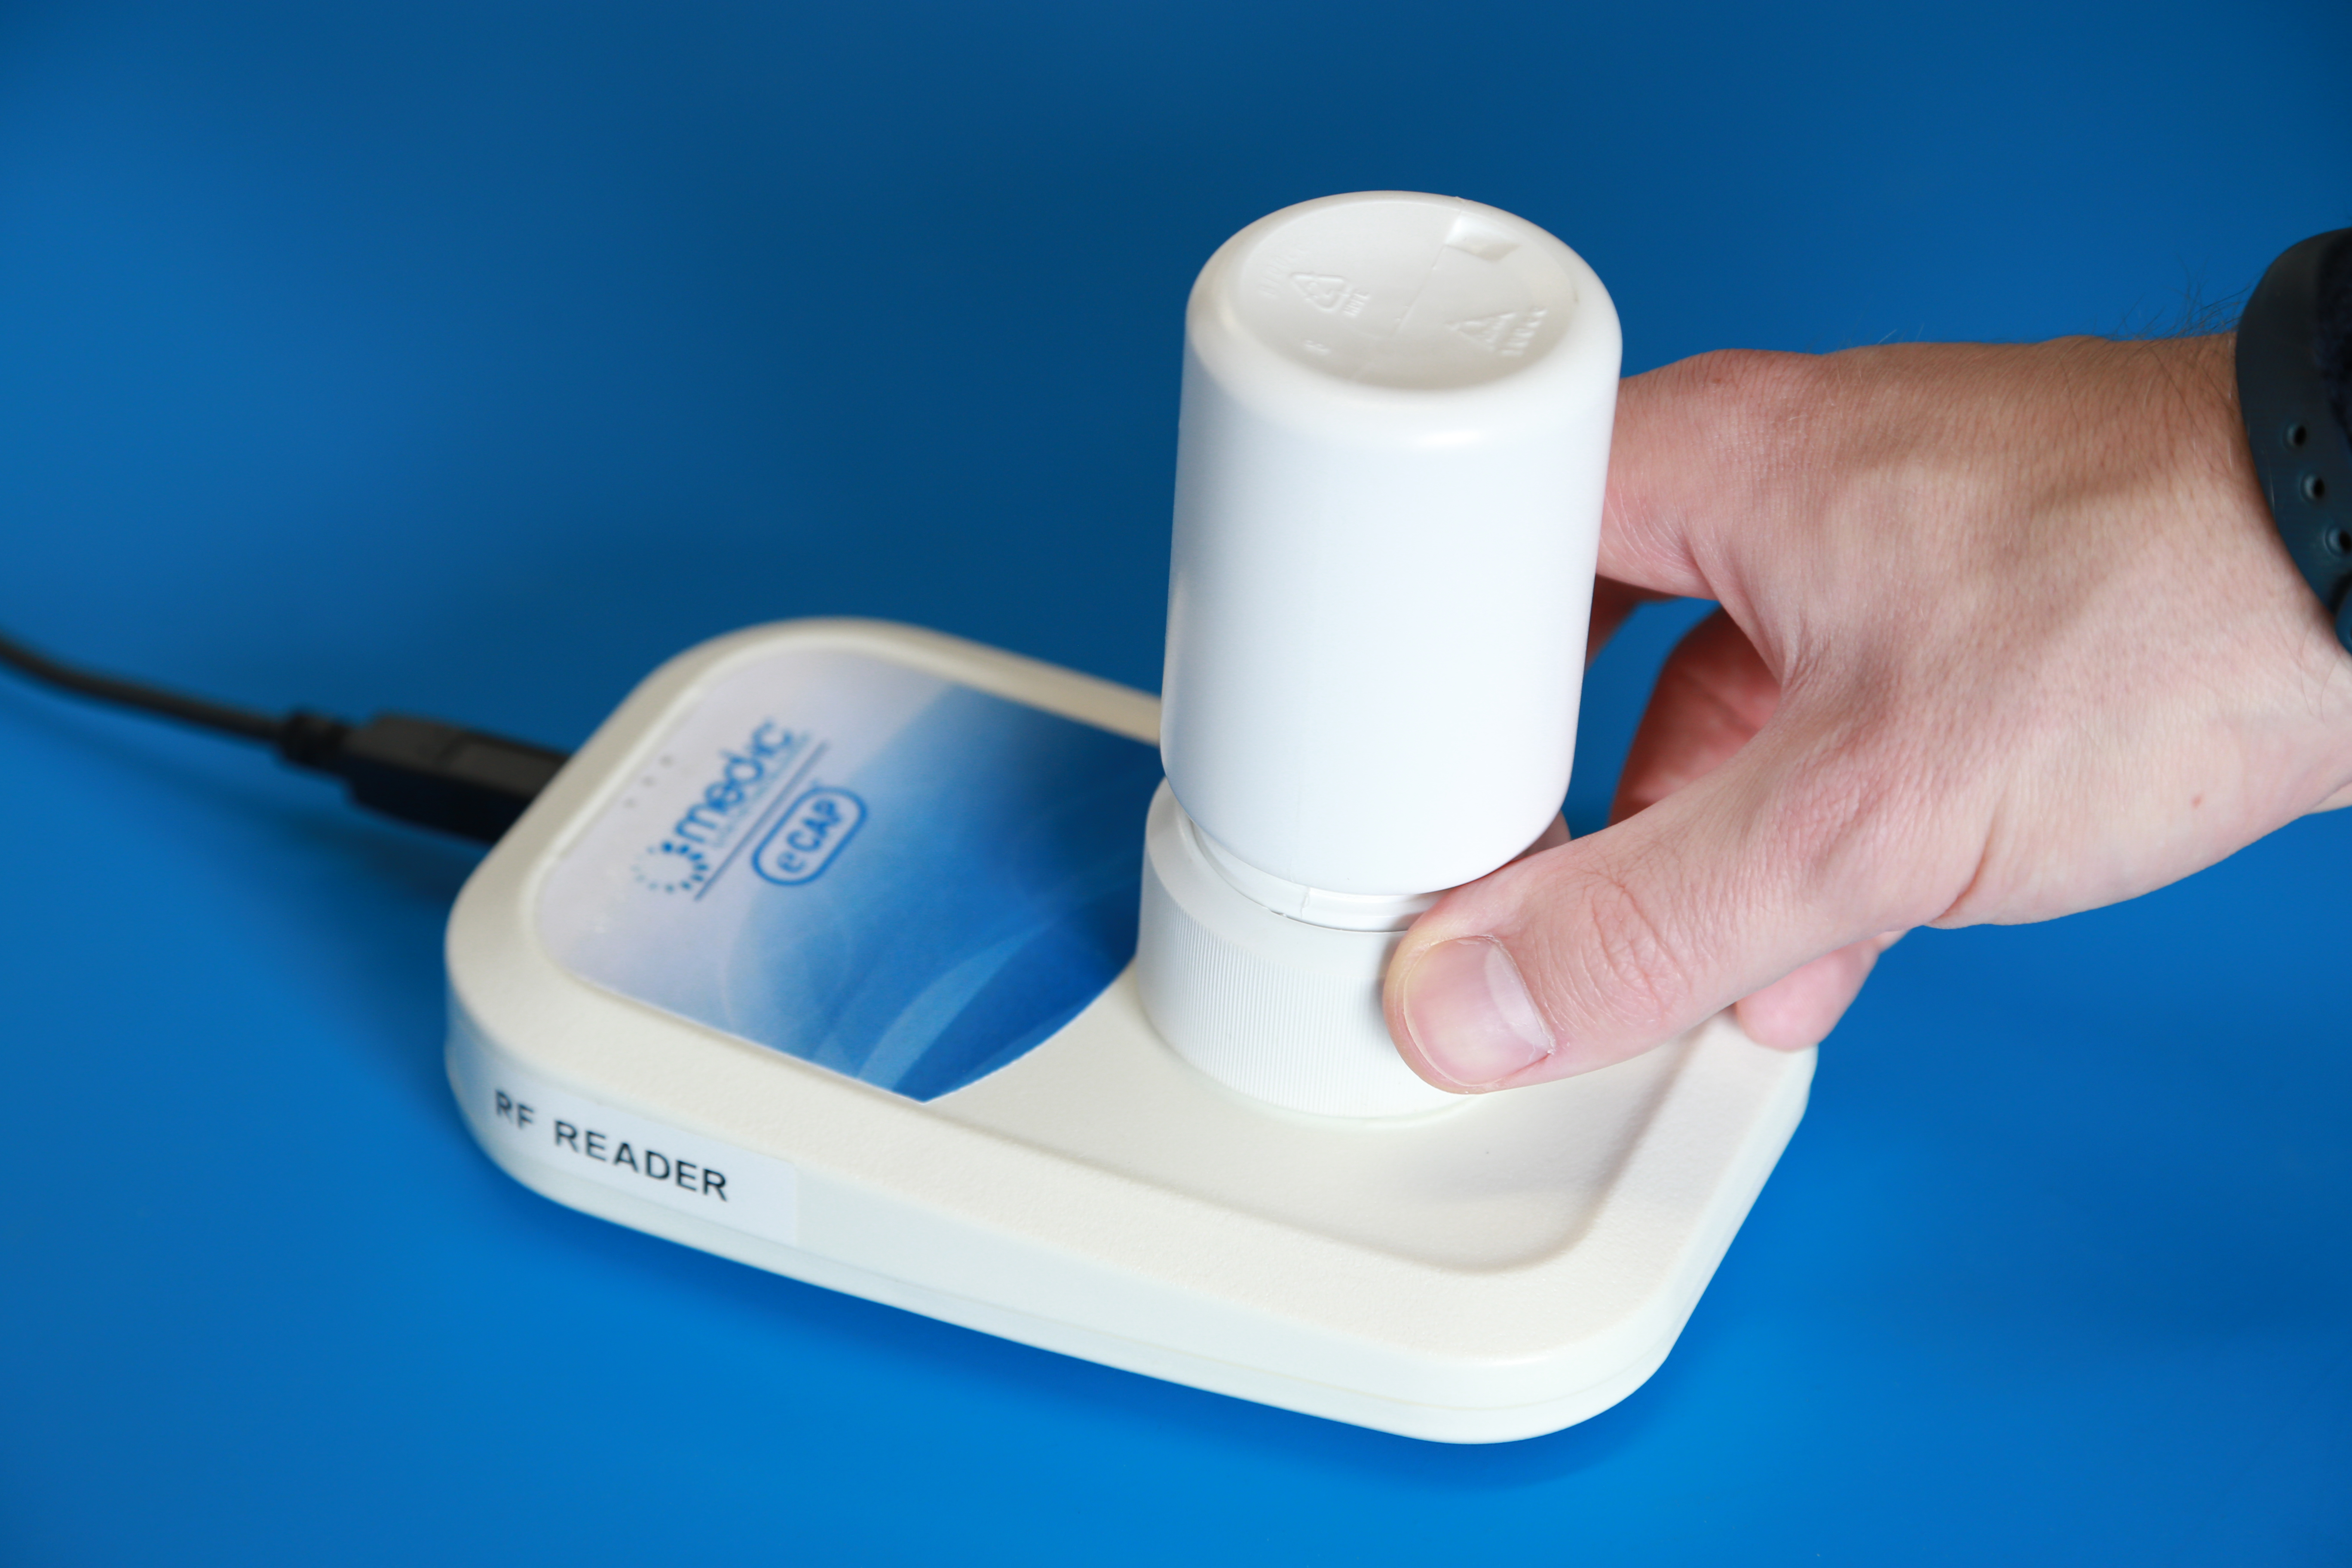
- Replace lid from pharmacy medication with eCAP.
- Place eCAP top-down against reader scan symbol (if assignin Med-ic, there will be a printed symbol on the cardboard indicating where to scan).
- Chirping noise indicates reader communication.
- Follow the on-screen instructions.

After setting up the regimen and assigning eCAP(s), click Submit and wait for the patient to be set up (this may take a few seconds).
Mobile App Set Up
Projects that are not using remote monitoring can (and should) skip this section.
If the patient needs to access the mobile app, they must have an invite code.
- Go to the “Patients” page.
- Find the patient who needs remote access, and click the invite to reveal a 1-page print-out with simple instructions for the patient.
- Communicate the invite details to the patient (either the code alone or the whole page).